MAW-10 PORTED SUBWOOFER
Giovanni Militano 

Page 1: Introduction, Driver, Ported Enclosures, Design
Page 2: Construction, Costs, Sound
CONSTRUCTION
The enclosure for this project has been constructed using 3/4" (19 mm) MDF. Photograph 02 below shows the start of enclosure construction. Enclosure assembly was completed using only glue and once dry all the internal joints were sealed with caulking.
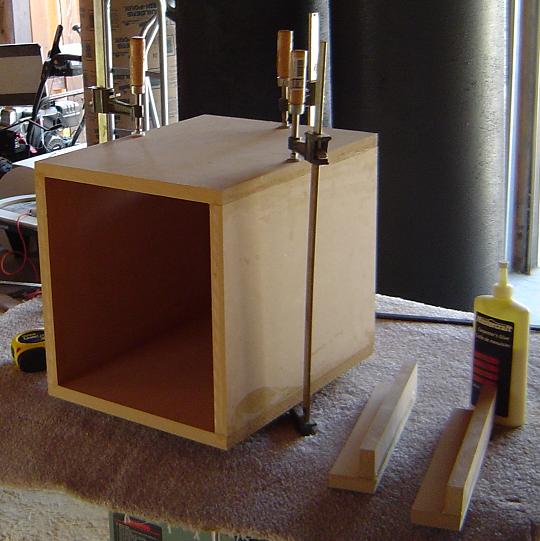
Photograph 02: Ported Subwoofer Enclosure Construction
The front baffle consists of two pieces of 3/4" MDF which were glued together. For a nice flush finish the driver is countersunk into the baffle as shown in Photograph 03.
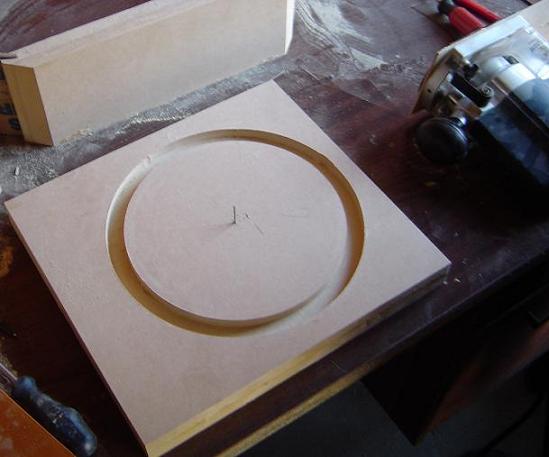
Photograph 03: Front Baffle
Photograph 04 below shows the assembled subwoofer enclosure prior to finishing. The internal walls of the enclosure were lined with some left over carpet underlay and T-nuts are installed in the front baffle to hold the heavy driver in place.
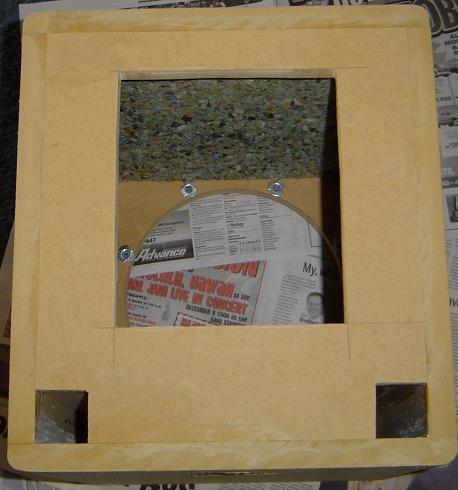
Photograph 04: Unfinished Enclosure
To make the subwoofer more versatile, the driver is connected to a switch which allows the ability to switch between the plate amplifier or binding posts for use with an external amplifier. Active power is supplied from a 70W Parts Express plate amplifier (part #300-784).
Also shown in the photograph are the brass speaker spikes which will couple the subwoofer firmly with the ground.
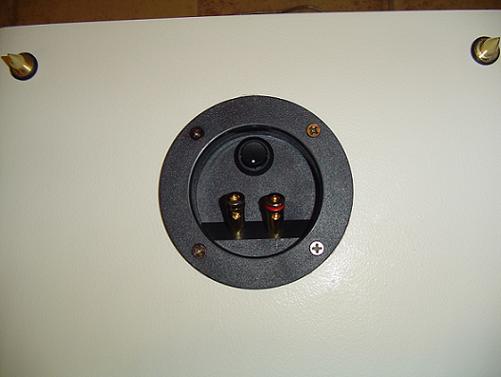
Photograph 05: Binding Posts and Switch for External Amplifier
The subwoofer enclosure is finished with two coats of white sealing primer and two coats of an off-white cream. The paint was left over from the Sealed Bipole with Fostex FE127E project. Photograph 06 shows the rear of the subwoofer enclosure after the plate amplifier has been installed.
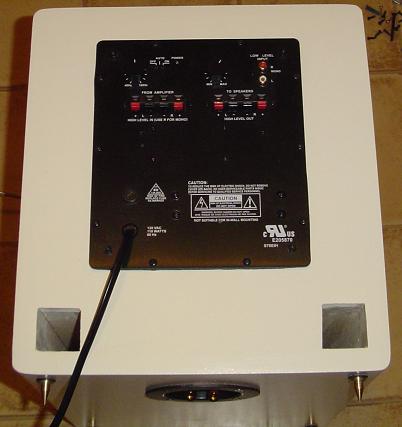
Photograph 06: Finished Subwoofer Enclosure and Plate Amplifier
Photograph 07 shows the internals of the subwoofer enclosure. The carpet underlay was installed using a heavy duty stapler. Prior to installing the driver, fiberglass insulation is stuffed loosely in the box to provide additional damping (Photograph 08).

Photograph 07: Interior View of Subwoofer Enclosure

Photograph 08: Fiberglass Insulation for Damping
COSTS
| ITEM | QTY | COST | SOURCE | NOTES |
|---|---|---|---|---|
|
MAW-10 Driver
70W Plate Amp 3/4" MDF Primer and Paint Terminal Cup Speaker Spikes |
1
1 - - 1 4 |
$35.88
$52 ~$8 ~$7 $3 $3.52 |
Mach 5 Audio
Parts Express Rona Rona Mach 5 Audio Mach 5 Audio |
No shipping, purchased locally.
Used, includes shipping cost. Left over from FE127E Project Left over from FE127E Project No shipping, purchased locally. No shipping, purchased locally. |
Total cost ~$110US
SOUND
The subwoofer performs very well, producing nice tight bass. With the rear porting, you have some flexibility to adjust the response by moving towards or away from a wall. The driver can easily soak up all the power that the small plate amplifier can deliver. The MAW-10 subwoofer easily outperforms my 10" JBL PB-10 subwoofer and it integrates very well with my Fostex FE127E Sealed Bipole Project. Over all, this sub performs very well and it makes for a simple and inexpensive project.
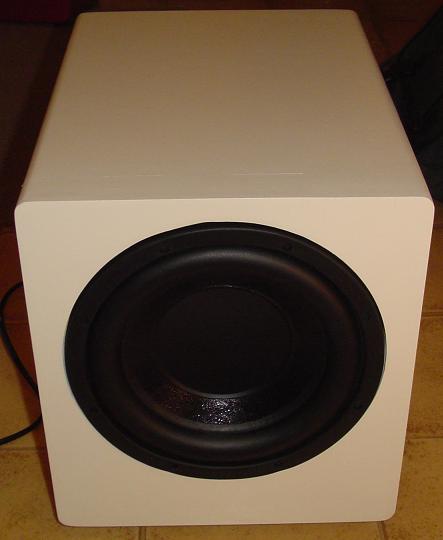
Photograph 09: Front View: Finished Subwoofer
UPDATES
05 Nov 2007 - I was very pleased to receive an email from Jim who completed this project. Follow the link to see a picture of his MAW-10 DIY Subwoofer Project.
12 April 2008 - The figure below shows an impedance sweep of the subwoofer in the enclosure. The impedance sweep was generated using the Dayton Audio Woofer Tester 3. Using WinISD, the enclosure was tuned to 29Hz with no stuffing. From the plot you can see that the actual box tuning with the stuffing and lined walls is about 27Hz.
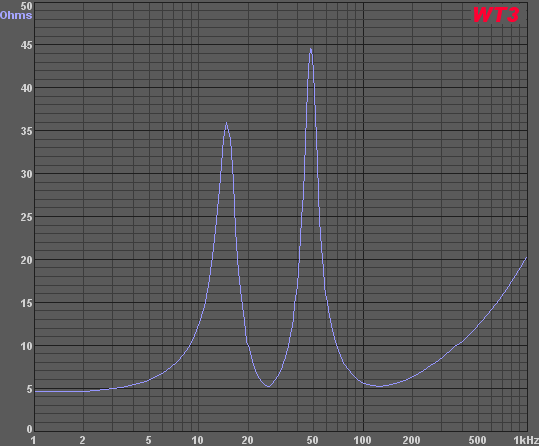
Figure 02: Measured Impedance - MAW-10 DIY Subwoofer

Introduction, Driver, Ported Enclosures, Design |
[ 1 | 2 ] |
